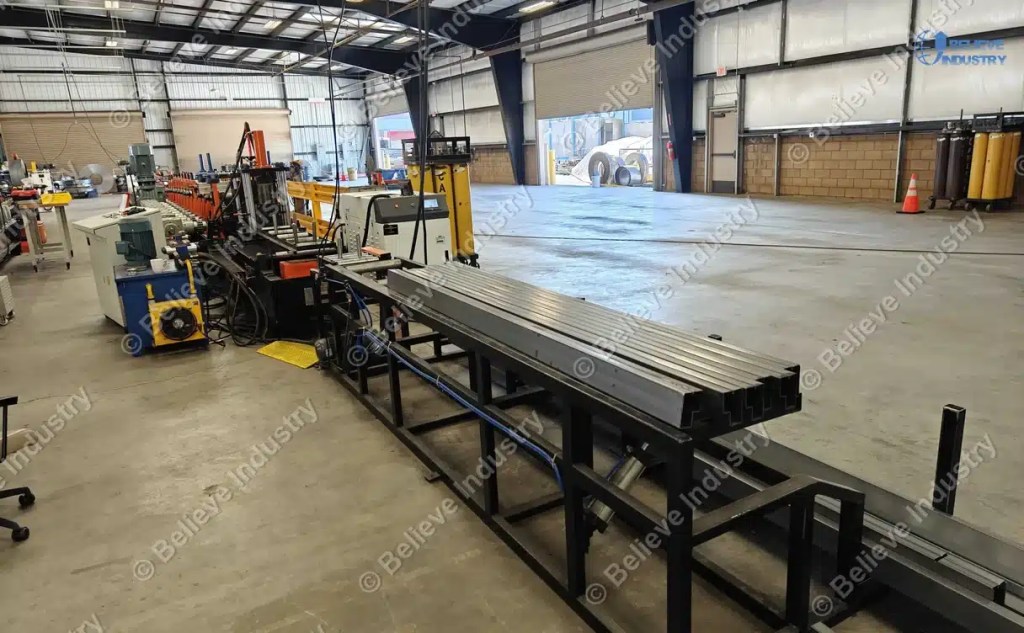
Step beam roll forming machine forming line and run out table

Step Beam Production Process: 6 Steps From Coil to Rack Beam

Apakah Anda memerlukan mesin pembentuk profil untuk proyek Anda?
Dapatkan penawaran gratis dari Believe Industry — lebih dari 15 tahun memproduksi mesin pembentuk profil kustom.
formulir permintaan penawaran Unduh katalog

Step Beam Production Process: From Coil to Pallet Rack Beam

Jawaban singkat: The step beam production process runs six stations in a fixed order: coil loading, levelling and feeding, pre-punching, roll forming, end notching with cut-off, then stacking. The order is not flexible. Punch before forming or the hole pattern drifts. Cut after forming or the section distorts.
A step beam is the horizontal member that carries pallet loads between upright frames. It starts as flat strip and ends as a stepped profile with bolt holes at both ends, and each of the six operations between those states leaves a mark the next station has to live with. This guide walks the step beam production process in order and shows where a line quietly loses output.

The Six Stations at a Glance

Every step beam production process runs these six stations, from an entry machine to a fully automated cell. What changes is how much automation sits between them.
StasiunPeralatanMain parameterTypical failure
1. Coil loadingHydraulic decoiler, coil car5 to 10 t coil, 508 mm IDStrip off centre, camber starts here
2. Levelling and feedingStraightener, servo feederFeed pitch 0.2 mmSlip on oily strip
3. Pre-punchingHydraulic or servo punchHole pitch +/- 0.5 mmDie wear, slug build-up
4. Roll forming26 to 30 forming stands8 to 25 m/minEdge wave, twist, bow
5. End notching and cut-offNotching press, flying shearCut length +/- 1 mmRagged cut, burr at notch
6. StackingMagnetic or chain stacker15 to 25 bundles/hBeam misalignment in bundle
Read the table in order, because that is how a step beam production process travels. A fault showing up at station 4 usually began at station 2.
Step beam roll forming machine forming line and run out table

Station 1: Coil Loading and Decoiling

The step beam production process starts with a coil, not with a forming stand. Coil weight sets decoiler size, and strip width decides how far the line can grow later.
Most rack beam lines take 5 to 10 t coils with a 508 mm inner diameter. A 10 t coil at 1.5 mm and 300 mm width holds about 2,800 m of strip, roughly four shifts at 12 m/min, so coil changes get planned per shift. Each costs 20 to 40 minutes with a coil car.
Two details here shape every downstream measurement. Mandrel alignment comes first. If the decoiler axis sits 1 mm out of square with the line centre, the beam bows in a way no roller adjustment fully removes. Coil set comes second: a five to seven roll straightener removes most of it.
Step beam production process decoiler and hydraulic punching unit

Station 2: Levelling and Feeding

The feeder sets the rhythm for the whole step beam production process. It advances the strip a fixed distance, stops, lets the punch fire, then advances again.
A servo feeder holds about 0.2 mm of feed pitch at 20 m/min. Pneumatic feeders drift on oily strip, and 0.2 mm per stroke compounds into a hole pattern that no longer matches the upright slot.
Punch cycle, not feeder speed, caps the step beam production process near 15 m/min at a 50 mm hole pitch. A servo punch with a flying die raises that ceiling.

Station 3: Pre-Punching Before the Strip Is Formed

This station decides whether the step beam production process makes good beams or expensive scrap.
Holes go in while the strip is still flat. A flat strip rests on a solid die, the punch lands square, and the hole edge stays clean. Punch after forming and the punch must reach into a stepped section, the die must be shaped to match, and the hole edge tears at the step radius.
Pre-punching also allows a simple rectangular die block, so a worn die means replacing one insert. The trade-off is flexibility: hole pattern is fixed by die and feed length together, so a pattern change means a die change. Our guide to pemasangan cetakan pelubang covers the alignment checks that keep a die running straight.
Tonnage follows thickness and hole size: a 14 mm hole in 2.0 mm mild steel needs about 12 t, a 22 mm hole about 19 t. Size the press for the largest hole in the mix, then add 30 percent.

Station 4: Roll Forming, Pass by Pass

Forming is the longest stretch of the step beam production process: 26 to 30 stands, against 12 to 16 for a plain C channel. The extra stands exist because the step beam carries a stepped flange, a return lip, and a stiffening rib along the web.
The passes divide into three groups. The first eight to ten pre-bend flange and lip without closing any angle fully, spreading the total bend across many small increments so the steel does not work-harden in one spot. The middle ten to twelve bring the section to shape, and this is where twist appears if the two sides bend at different rates. A 0.3 mm roll gap difference between sides shows up as visible twist over a 3 m beam. The last six to eight are sizing passes that correct what earlier passes left behind.
Too few sizing stands means no recovery from a middle-pass error, which is why 18-stand lines struggle above 1.5 mm thickness. Stand count is the first thing to check on a low quotation.
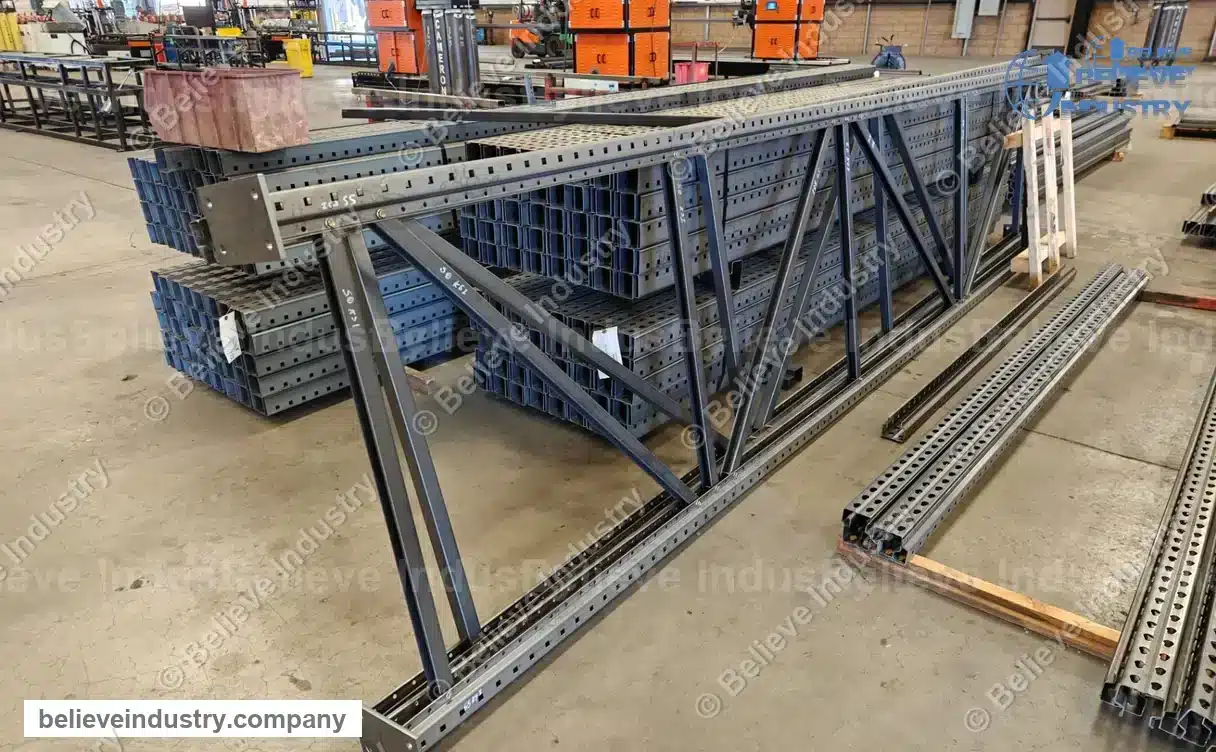
Racking profile samples uprights step beams and C bracing

Station 5: End Notching and Cut-Off

The beam end carries the connector, so the step beam production process has to notch it before the connector sits flush.
End notching removes the return lip and part of the flange at both ends. Notch depth follows the connector type rather than beam size: a beam built for a three-tab connector needs a deeper notch than one built for a two-tab connector. Notch depth errors are the most common reason a finished beam will not seat on an upright.
Cut-off splits three ways.
Cut-off typeKecepatanCut qualityTerbaik untuk
Stop-and-cut hydraulic8 sampai 12 m/menitGood, slight burrLow volume, mixed lengths
Flying shear20 sampai 30 m/minClean and squareVolume, fixed lengths
Flying saw15 hingga 25 m/minClean, needs deburrThick section, heavy beam
A flying shear cuts while strip moves, so the step beam production process never stops at the knife. A stop-and-cut line loses 0.6 to 1.2 seconds per beam, which at 6 m lengths costs 8 to 12 percent of shift output. Length tolerance runs +/- 1 mm, and above 3 m thermal growth on a warm line eats half that budget, so measure the first beam of each shift cold.
Double station welder for step beam and end clips

Station 6: Stacking and Bundling

The last station of the step beam production process decides whether the previous five look good. A straight beam can be bent by a bad stacker.
Magnetic stackers lift beams off the run-out table and lay them in layers, at about 20 beams per minute on a 20 m/min line. Chain stackers cost less but drag the beam, and dragging marks galvanized surfaces.
Bundle count beats stacker speed. A 20 m/min line with 6 m beams makes about 200 beams per hour, or 20 bundles of 10, so a stacker managing 15 bundles leaves the line waiting. Length, hole position, and straightness get measured at the bundle, not at the stand.

Where the Step Beam Production Process Loses Output

Rated speed is a machine number. In a step beam production process, real output is a process number, and the gap is a bottleneck.
KonfigurasiRated speedReal 8 h outputLimiting station
Entry line, stop-and-cut, manual stack10 m/min90 to 110 beamsCut-off stop time
Standard line, flying shear, auto stacker20 m/min180 to 220 beamsStacker or coil change
Welded line, inline welding, auto stacker15 m/min140 to 170 beamsWeld cycle
Three leaks drain every step beam production process. Coil changes cost 20 to 40 minutes each, so a shift running two coils loses 40 to 80 minutes of the 480 available. Depth changeover costs 2 to 4 hours with a full roll set change, or 30 to 60 minutes with cassette tooling, as our multi-profile line guide explains. Minor stops add 3 to 8 percent on a well-run line, up to 15 percent on a neglected one, and most trace back to the punch station.

How the Sequence Changes for Other Rack Profiles

The order holds for every roll formed rack member. Where the time goes changes.
ProfilDudukan pembentukPunch positionExtra station
Balok bertingkat26 to 30Pre-punch, flat stripEnd notching
Balok kotak20 to 24 forming plus 4 to 6 seamPre-punch, flat stripSeam welding, straightener
Upright column18 hingga 24 tahunFormulir pos3 or 4 face punching
Penopang C10 to 14Punch awalTidak ada
A box beam adds a closing operation, so the process gains a seam welder and, critically, a straightener after it. Without one the weld pulls the section and every beam bows the same way, as our step beam vs box beam breakdown shows. Upright columns break the pre-punch rule, since their holes sit on three or four faces and get punched after forming, with dies reaching in from the sides.

Planning the Line Around Your Beam Range

Planning a step beam production process starts with three numbers.
Depth range sets stand count and tooling cost. A line covering 80 to 120 mm needs one tooling set per depth, while 80 to 160 mm needs four, so a single price for a range is misleading. Annual length sets cut-off type: below 300,000 m a stop-and-cut line pays back, above that the 8 to 12 percent shift loss costs more than a flying shear. Connector type sets notch geometry, so get the connector drawing before the tooling drawing.
Design requirements behind these numbers are published by the Rack Manufacturers Institute, and coating rules for galvanized beams sit with the Asosiasi Galvanis Amerika.
Believe Industry has built custom roll forming lines since 2005, with 15+ years of experience, 80+ engineers and 500+ projects in 50+ countries under ISO 9001 and CE. We size stands, punch tonnage, and cut-off type against your beam range and volume, so the step beam production process matches your product mix, not a catalogue default. Our roll forming machine line guide explains what each module adds.

Pertanyaan yang sering diajukan

Q: What is the correct order of operations in a step beam production process?

Decoiling, levelling and feeding, pre-punching, roll forming, end notching, cut-off, and stacking. Punching comes before forming because holes are cleaner and cheaper to tool in flat strip. Cutting comes last because length cannot be fixed until the profile is complete.

Q: Why is pre-punching better than punching after forming?

A flat strip sits on a solid die, so the punch cuts square and the hole edge stays clean. After forming, the punch must enter a stepped section and edges tear at the bend radius. A rectangular die also costs less to replace.

Q: How many forming stands does a step beam line need?

A step beam production process usually runs 26 to 30 stands: 8 to 10 pre-bending, 10 to 12 forming, 6 to 8 sizing. Under 24 stands, 1.5 mm coil gets difficult and there is no room to correct a middle-pass error.

T: Seberapa cepat jalur ini berjalan?

Hydraulic with stop-and-cut runs 8 to 12 m/min. Servo with a flying shear runs 15 to 25 m/min. Add inline welding and the weld cycle holds the step beam production process at 10 to 15 m/min regardless of forming speed.

Q: What causes hole position drift?

In a step beam production process, drift usually comes from the feeder, not the die. Oily strip slips and each stroke moves 0.1 to 0.2 mm. Check feed pitch over 50 strokes before touching the punch. Die wear and slug build-up rank second and third.

Q: What tolerance should a finished beam hold?

Length +/- 1 mm, hole pitch +/- 0.5 mm, straightness about 1 mm per metre, twist under 2 mm over 3 m. Connector fit fails before those numbers look bad on paper, so test a real connector on the first beam of each run.
*Last updated: 2026-11-01*
*Article Changelog: 2026-11-01: Initial publication.*
*Next Review Triggers: A buyer needs a welded line above 30 m/min; RMI updates beam design requirements; cassette tooling prices shift the changeover payback.*

Daftar isi

Pembaruan Baru