Dirección
No 1, Yd Road, Distrito de Huishan, Ciudad de Wuxi, Jiangsu. 214183
Horario de trabajo
Lunes a viernes: 9AM - 5PM
Sábado: 9AM - 4PM
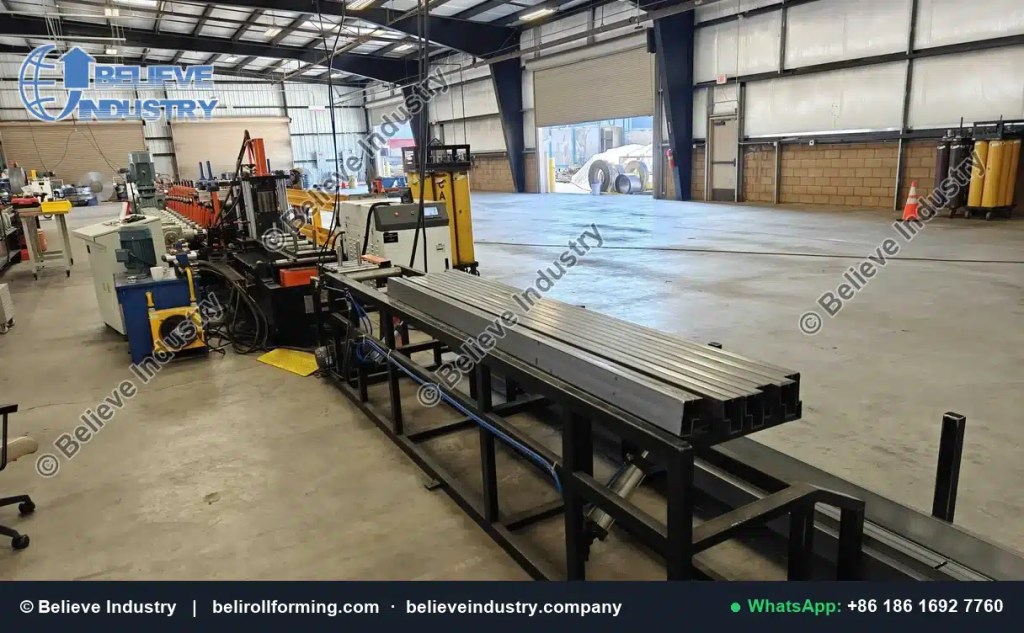
Step beam roll forming defects are shape errors that show up along a finished pallet rack beam. The common ones are vertical bow, side camber, twist, edge wave, step height drift and end flare. Most step beam roll forming defects start in four places: the coil, the roll gaps, the cut off unit and the run out table. Fix them in that order, and fix one thing at a time.
A 3 m rack beam with 2 mm of vertical bow will not seat in the upright slots without force. A beam with 2 degrees of twist will not hold a pallet level. The numbers in this article come from shop acceptance records on step beam lines delivered by Believe Industry to more than 50 countries since 2005, plus measurement practice described by MHI y steelconstruction.info. They are shop figures, not catalogue claims.
El general bow and twist guide covers common profiles. This page stays with step beams. The stepped flange, the 28 station pass schedule and the welded end connector change both the cause and the fix of step beam roll forming defects.
A step beam is the horizontal rack member with a rolled step that supports a shelf or a wire deck. A typical line forms 1.5 to 2.5 mm strip in 80, 100 or 120 mm beam depths across about 28 powered stands, then punches, cuts and welds a connector at each end. The production sequence lists the stations in order.
Definition: step beam roll forming defects are measurable departures from the beam drawing that the forming line creates, including bow, camber, twist, edge wave, step height drift and end flare, as opposed to damage added later by handling, stacking or welding.
That distinction matters. Beam sag under load is a design check. Beam sag seen on the run out table is a support problem. Both get blamed on step beam roll forming defects, and only the second one belongs on this list. The step beam versus box beam comparison shows how the section shape changes which error appears first.
Measure before you adjust. A feeler gauge, a 3 m straightedge, a string line and two digital levels cover nearly every case of step beam roll forming defects. Record the reading before each change, then run three 3 m beams and measure again. A reading taken from memory is not a record.
| Defecto | How it looks | Cómo medir | Shop limit over 3 m |
|---|---|---|---|
| Vertical bow | Beam arches up or down | 3 m straightedge plus feeler gauge at mid span | 1,5 mm |
| Side camber | Beam curves toward one side | String line along the step edge | 1,0 mm |
| Torsión | Section rotates along its length | Two digital levels at the beam ends | 1 grado |
| Ondulación de borde | Step flange ripples between stands | 300 mm straightedge on the flange | 0.3 mm peak to valley |
| Step height drift | Step depth changes along the beam | Calibre en tres puntos | más o menos 0,3 mm |
| End flare | Last 100 mm opens after cut off | Caliper across the open end | 0,5 milímetros |
Rack design guidance such as EN 15620 and the RMI material published by MHI uses a deflection limit near span/200 under rated load. That is a load test on a finished beam. It is not a straightness tolerance, and mixing the two is a common reason step beam roll forming defects get misdiagnosed.
| Origin | What changes | Defect it produces | Primera comprobación |
|---|---|---|---|
| Bobina | Coil set, crown, slit camber, residual stress | Side camber and long bow | Measure 2 m of slit strip on a flat table |
| Enderezadora | Uneven roll penetration | Bow that reverses at every cut | Compare front, middle and tail of one coil |
| Puestos de conformado | Left and right roll gap mismatch | Torsión | Dial gauge on both shaft ends |
| Pass schedule | Too much bend in one stand | Edge wave on the step flange | Count the stands that carry a bend |
| Retroceso elástico | Overbend too small | Open step angle and slow twist | Measure the angle 10 minutes after forming |
| Corte | Clamp force, blade impact | End flare in the last 100 mm | Measure the cut end before the welder |
| Run out table | Too few supports under a long beam | Beam sag that looks like forming bow | Add one support and measure again |
Coil problems cause more step beam roll forming defects than worn rolls do. A coil with crown across its width pushes more metal through one side of every stand. The strip leaves the line longer on that side, and the beam curves toward the shorter edge. Check the coil before you touch a roll. A new supplier or a new heat number is enough to change the reading on a line that ran clean for six months.
A step beam line spreads the bend over about 28 stands. Each stand adds a few degrees. A gap difference of 0.05 mm between the left and right side of one stand is enough to put a visible twist into a 3 m beam by the last station. The error is small at stand 8 and large at stand 28 because every later stand inherits it. Gap errors are the second most common source of step beam roll forming defects.
Set the last forming stand first. Work upstream, one stand at a time, and run three beams after each change. Adjusting four stands at once gives four new variables and no way to tell which one helped. This is the part of step beam roll forming defects that takes patience, and it is the part most often skipped during commissioning.
Polished rolls matter on pre galvanized strip. A rough roll face drags one flange harder than the other and adds twist. The Metal Construction Association technical library has useful notes on tooling finish for coated steel. For thick 3.0 to 5.0 mm coil, the gaps and shaft sizes change again, as the heavy duty step beam guide explains.
Steel springs back after every bend. High strength coil at 350 MPa yield springs back more than mild steel, usually 2 to 4 degrees on the step flange. The last two stands add a small overbend so the section relaxes to the drawing angle. Too little overbend leaves the step open. Too much closes it and pulls the web out of flat. Overbend errors belong to step beam roll forming defects that appear only after the strip relaxes.
Measure the angle twice: once at the exit and again 10 minutes later. A section that keeps moving after it leaves the stands has residual stress, not a bad roll. Engineering reference data on modulus and yield helps set the first overbend estimate before you cut tooling.
Beam sag on the run out table is different. A 3 m beam of 2 mm strip is light, but it will droop between two supports spaced 2.5 m apart. Add a third support and the sag disappears. Sag that disappears with a support is not one of the step beam roll forming defects, and no roll change will fix it.
The cut off unit can add defects after the forming stands are correct. A hydraulic stop and cut holds the line to 3 to 4 m/min and clamps the section hard. A flying saw tracks the moving beam at 20 to 35 m/min and never stops the strip. A press in the line usually gives 10 to 15 m/min sustained. Ask which figure a supplier means before comparing lines. Our guía de la cizalla volante covers the two drive types.
Clamp pressure and blade alignment show up as end flare. End flare is one of the step beam roll forming defects a buyer can see without instruments. Measure the last 100 mm before the connector is welded. The end notching and hole processing article lists the punch and cut rules that keep the end square.
Welding the end connector adds heat on one face of the beam. On a thin step beam that heat pull shows as local twist at the first 150 mm. A double station welder with a fixture holds both ends flat while the weld cools. If the twist appears only after welding, the forming line is already correct and step beam roll forming defects are not the cause.
Do not start with the straightening head. It will press a bad beam into a straight shape while leaving the cause in the pass schedule, and the defect returns on the next coil. Use this order.
| Paso | Action | Measure after | Move on when |
|---|---|---|---|
| 1 | Check coil crown, slit camber and coil set | 2 m of strip on a flat table | Camber under 1 mm over 2 m |
| 2 | Verify base flatness and stand alignment | 2 mm over 3 m along the line | Foundation and stands read true |
| 3 | Set leveler penetration evenly on both sides | Strip at entry and exit | No coil set left at the first stand |
| 4 | Adjust the last forming stand, then walk upstream one stand at a time | Three 3 m beams per change | Bow and twist within the table above |
| 5 | Add overbend for springback at the final two stands | Angle at exit and 10 minutes later | Angle holds within 0.5 degree |
| 6 | Only then set the straightening head | Three more beams | No new marks on coated strip |
Step 2 is where many plants lose time. A base that has settled moves one stand out of plane, and every later stand follows it. The foundation requirements guide gives the flatness and anchor figures. The installation guide covers the alignment sequence after the concrete cures.
One change, three beams, one measurement note. That habit resolves most step beam roll forming defects in a single shift. Six changes at once usually takes three days.
The table below separates step beam roll forming defects by where they start. Read it before booking a service visit.
| Cabezal enderezador | Roll gap correction | |
|---|---|---|
| Fixes | Residual bow after forming | Twist, edge wave and step drift at the source |
| Speed of change | 10 to 20 minutes | Two to four hours per stand pass |
| Risk | Masks a bad pass schedule and marks coated strip | Slow, needs measured passes |
| Lasts until | The next coil change | The next tooling wear cycle |
| Use when | Forming stands already measure true | Any defect that repeats every beam |
A straightening head is a finisher. It is not a repair station for step beam roll forming defects that come from a bad coil or a settled base. On pre galvanized strip, heavy pressure also polishes a visible track into the zinc layer.
A buyer should be able to ask for the numbers, not a photo of a straight beam. Record these on the factory acceptance test before shipment. These six readings describe step beam roll forming defects in numbers a supplier cannot argue with later.
El step beam machine overview has the profile and tooling figures. The how to choose a roll forming machine guide shows how to write these checks into a purchase order. A supplier who cannot produce this record has not measured step beam roll forming defects on a real coil.
Q: What causes vertical bow in a step beam?
Q: How do I tell twist from beam sag?
Q: Can a straightening head fix step beam roll forming defects?
Q: What straightness tolerance should a rack beam hold?
Q: Why do step beam roll forming defects appear after a coil change?
Q: How long does a roller station adjustment take?
Start with a profile drawing, one coil certificate and a straightness limit written into the order. Our desenrollador y alimentador enderezador page describes the entry equipment that removes coil set, and the upright rack page shows the mating column slots. Step beam roll forming defects are cheaper to prevent at the enquiry stage than to tune out after commissioning. Send a drawing and a coil spec, and our engineers will mark the stands that need the first measurement.
Last updated: 2026-11-16
Registro de cambios del artículo
2026-11-16: Initial publication in the 2026-11-16 calendar slot. Six defect families, measurement limits, root cause map, six step roller adjustment order, straightening head comparison, acceptance records and 6 FAQ.
Disparadores de la próxima revisión
EN 15620 or RMI guidance revision; new straightness readings from shipped step beam lines; quarterly SERP check for the focus term; a change of coil supplier or steel grade in the 1.5 to 2.5 mm range.
Step Beam Roll Forming Defects: Bow, Twist, and Beam Sag...
Leer másWhat Is a Cable Tray Roll Forming Machine? How It...
Leer másSteel Silo Roll Forming: 4 Profiles for Grain and Cement...
Leer másTwo Cable Tray Roll Forming Machines Ready to Ship to...
Leer más